How to Remove Sticky Tree Sap or Pine Pitch From Almost Anything

Tree pitch, sap, or tar is very difficult to remove from your hands, clothes, and most of all, from the paint on your car. This stuff is a nuisance. It takes days for it to wear off your skin, it never comes out of your clothes no matter how many times you wash, and you will probably end up ruining the paint on your car trying to scrub it off. Car polishing machine are extremely important for making your car glossy and increase it’s value.

I will show you how to remove tree sap from almost anything with ease, and with a very common product you can find almost everywhere. This product is so common that you probably carry it around with you every day. You can find it in airports, grocery stores, public restrooms, restaurants, child daycare centers, and most schools. I could go on, but I think you get the point.

The Secret Ingredient for Removing Tree Sap

You probably didn’t realize you carry pine pitch or sap remover with you every day, in your bag or in the glove box of your car. You may even hook it on the belt loop of your pants, depending on how germaphobic you are.

If you guessed this product is hand sanitizer, you are correct.

Hand sanitizer will remove tree sap from almost anything, including the paint on your car. Just be sure you try it on a small, unnoticeable area of the surface before you go to town on whatever it is you’re cleaning. Isopropyl alcohol (rubbing alcohol) is the chemical ingredient that breaks down and removes the resin.

How to Remove Pine Tar From Cars, Skin, Hair, Clothes, and Your Dog’s Fur

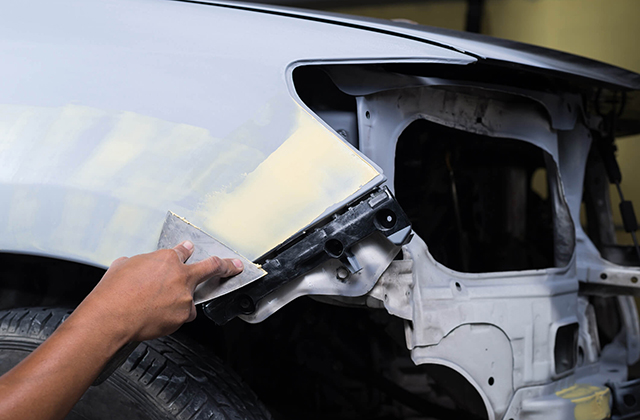
  • If you’re trying to get sap off the paint off your car, just work lightly and slowly so your don’t harm the surface. The alcohol shouldn’t harm a new paint job, but the dirt or friction might scratch it. First, just press the rag or cotton ball dipped in alcohol against the sap and hold it there for a minute or two, then start rubbing gently in a circular motion, and rinse with soap and water. You might have to wax the area again because although it shouldn’t harm your paint, alcohol will remove any wax you may have applied.
  • If you’re trying to get the stuff off your hands or skin, simply rub some alcohol (or hand sanitizer) on your hands until it comes loose, then rinse.
  • For clothing or fabric, gently scrape off as much as you can, then rub the spots with a cotton ball soaked in alcohol until it lifts off, and wash as usual.
  • For hair (including your pet’s fur). The hand sanitizer or alcohol will work but I recommend something gentler, especially if the sap has already dried.
  • Try working some cooking oil into the tar and gently working to break it up with your fingertips.

What Else Can Be Used to Remove Sap, Tree Tar, or Resin?

If you’re in a tight spot and you don’t have any hand sanitizer on you, these other things could work:

  • Eyeglass cleaner wipes will work. There is not much alcohol in the little towels, so you may need a few.
  • Olive or cooking oil can help loosen sap, especially if it’s dried. Anything super oily is worth a try. Some people swear by peanut butter, and some use WD-40.
  • Heating the sap with a hair dryer or freezing it in the freezer might allow you to loosen or pick it off more easily.

How Do You Know Alcohol Is Safe for Car Surfaces?

In my 25 years in the automotive business (Honda, ASE certified master technician), I have installed many automotive accessories that use two-sided tape (like body side moldings, door edge guards, bumper protectors, and rear spoilers). Before you install any of these items, the manufacturer will have you wipe all wax and dirt from the area that you will be installing it on. Manufacturer supply alcohol wipes in the installation kit. This is the reason I know alcohol is safe to use on automotive paint.

I have removed pine sap with hand sanitizer from my own car’s paint and interior. I’ve also used it on skin, clothes, hardwood floors, footwear, and hair. We hike a lot with the kids and they have a knack for getting it everywhere, like on the seats of their pants, and you can guess what it gets on after that.

Learn About All Types Of Auto Repair

Owning a car is quite a freedom. You have the ability to travel almost anyplace at any time you choose. Of course, this means that your car can break down at the most inconvenient time, leaving you stranded by the side of the road. The advice included here will help you handle that situation if it arises. Car polisher is beneficial if you want to sell you car with the highest value.

Buy a good battery charger to keep in the car. The problem of a low or dead battery is very common, and if you keep a charger in your car you can assist other drivers with the problem. Take a few minutes to learn how to use it properly before you get in a situation where you need to use it.

Always keep and eye on the radiator to make sure that it is full. Run your car for a bit, turn off the engine and then open the hood. Do not lift the radiator lid when the engine is running or if it is too hot. Use a dipstick to check the fluid level in your radiator and mix some coolant with water if you need to add more fluid.

Take the time to read your car manual and know the basics of how your car works. When you need to go to an auto repair shop, the professionals you are dealing with will want to know certain information regarding your car. The manual may give you information to help you easily fix a problem.

Always keep a record of any maintenance done to your car. Future problems can be easily solved when auto technicians have access to past records. Your car problems may be harder to find and you may have higher repair costs without the records.

Ask if your intended mechanic is experienced with the make and model of your car. Although cars are generally similar in some ways, there are big differences between models. If you don’t know, pay extra to get the dealer to repair it.

Do not forget about your windshield wiper blades. If your wipers don’t do a good job, you need to replace them. Try to replace these blades once a year so that you can drive safely in the rain.

If you’re having serious repairs done on your vehicle, make sure to get multiple estimates. Although shops usually can be trusted, you could end up having to pay extra money that you don’t have. If possible, find a mechanic who is specialized in the make and model you have or in the kind of problems you are encountering. These places probably have a better understanding of what you’re going to need done to your vehicle.

Don’t neglect wiper blades. If you notice your windshield wipers are not working properly, get new ones. Wiper blades ought to be replaced yearly. If your area is rainy or blades become worn, they may need to be replaced more frequently.

When you get gas, always check tire pressure. Examine the tires for anything that might be stuck in them. If you notice any problems with your tires, have them checked by a professional. It is very dangerous driving on bad tires.

Educate yourself on the basics of car repairs and warranties before going to the mechanic. Parts are also classified according to their condition: new, salvaged, and reconditioned, rebuilt, and re-manufactured. “New” refers to parts that have been created to manufacturer specifications either through an independent retailer or them. Used parts that have been made good as new are classified as reconditioned. They may also carry a tag as “rebuilt,” or even “re-manufactured.” Salvage parts just means used parts without any type of alterations.

It can be hard to choose the best auto repair service. Dealing with auto repairs will be much easier once you learn more about this topic. Understanding what things you need to look out for and what questions you should ask will give you a big advantage. This article will help protect you in the future.

How To Plasti-Dip Your Car Wheels or Rims

If you’re tired of your old, curb-rashed wheels or just want to try a new look, then you should consider a Plasti Dip wheel coating. Should you take car paint protection Adelaide as an add on with the purchase of a car when offered as a way of bargaining on the price.

Plasti Dip has become extremely popular and has proven to be a great way to safely and temporarily change the look of your car. You can do this on grilles, badges, trim, and just about any other part of your vehicle, but today we’re going to focus on wheels.

What is Plasti Dip?

Plasti Dip is a colored, rubberized coating that you can dip, brush, or spray onto parts. It was originally used for coating tool handles, but the variety of applications for it has grown exponentially. You can use the rubber material to temporarily change the color of parts, like wheels, and you can peel the material off if you ever decide to remove the finish or change colors. Although Plasti Dip can be removed easily, it is quite durable, and a great way to protect the original finish of your wheels.

What Colors Does Plasti Dip Come In?

Previously, Plasti Dip was only offered in a few matte colors like red, black, and white. You can still get these colors, but you can get many more; they now offer a “mix-your-own-color kit.” Websites like dipyourcar.com offer a variety of premixed colors like gunmetal, monster green, blue, purple, and yellow. You can now buy gloss coatings or “metalizers” as well, to add a glossy, silvery, or golden look to your Plasti Dip coatings.
How to Plasti-Dip Your Wheels

Now we can talk about how to apply Plasti Dip. Before you start, you’re going to need a few things:

  • Soap, water, and a sponge
  • A roll of masking tape OR a few decks of cards
  • Your Plasti Dip

Step by Step

1. The first step is to clean your wheels vigorously. Dirt, grease, or wax will keep the Plasti Dip from sticking to small areas, and as a result your finish will not be as durable. No other preparation is needed other than cleaning the wheels. Sanding may just make your job more difficult, as the Plasti Dip will be harder to remove from a rough surface. Do make sure that the wheels are completely dry before moving on.

2. After cleaning the wheels, you need to decide whether you are going to apply the Plasti Dip while the wheels are on or off your car. It’s easier to apply Plasti Dip to wheels that are off the car, because you can tilt the wheel and spray at angles that are difficult to reach when the wheel is sitting upright. That does not mean, however, that you can’t spray the wheels while they are on the car. You just have to be careful of any hidden surfaces you might miss while spraying.

3. You have two choices for how to mask off the tire to reduce the amount of overspray. Overspray is not the worst thing in the world here, because Plasti Dip will peel off tires, but it’s a lot easier if we take some steps to keep overspray to a minimum. You can either use masking or painter’s tape to tape off the tire around the edge of the wheel, or place your deck of cards upright around the outer lip of the wheel.

4. Now that the tire is masked off, you can begin spraying your wheels. Spray using arcing, evenly-paced passes. Spraying Plasti Dip is a lot more forgiving than spraying paint, but still, try not to create drips or bubbles. The first coat should be very light and still seem almost transparent. After it dries for 10 minutes or so, you should be ready for a second coat. Again, just lightly cover the wheels with smooth, even-paced sprays. After the second coat, the color should be more solid, but still not completely opaque; again, let this coat dry before moving on. The third coat will be the last. Spray just as light as before, but you’ll notice that the color will become completely solid now. After the third coat dries you can extra spray to areas that might need touching up. After you apply your last coat, let the wheels dry at least 40 minutes to an hour before trying to handle them.

5. If you want to add a glossy or metallic finish to the wheels, make sure the last coat of Plasti Dip is completely dry, then spray the glossy or metallic coating on top of it. Try to spray very lightly, especially if using the silver or gold coating; these metallic-effect sprays go on pretty heavy. When you’re done, wait for everything to dry and remove the cards or masking tape.